Connecting Brevo (SendInBlue) to Happyforms lets you manage your email marketing by automatically integrating your email lists with form submissions. This comprehensive guide will take you through the entire process, from configuring Happyforms to linking it to Brevo and testing the integration to ensure proper function.
Table of Contents
Installing Happyforms
First, make sure Happyforms Pro is set up and active on your WordPress website:
Step 1: Open your WordPress dashboard and log in.
Step 2: Go to Add new Plugin > Upload Plugin. Click Install once Happyforms Pro has been selected.
Step 3: Don’t forget to activate your plugin.
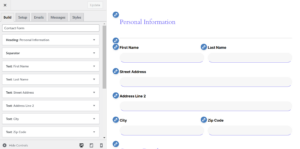
Step 4: Finally, you have two options: make your contact form or utilize the Happyforms template, which you can do by following these instructions.
Creating a Brevo (SendinBlue) Account
Email campaigns, automation, and other features are supported by Brevo an effective email marketing solution. To create your account, follow these steps:
Step 1: Click “Sign Up Free” on the Brevo website.
Step 2: Enter your email address and create a password to finish the signup process.

Step 3: To access the Brevo dashboard, confirm your email address and log in.
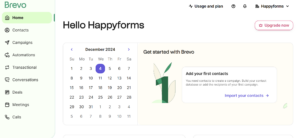
Step 4: Create your first email list under Contacts and get acquainted with the UI.
Integrating Brevo (SendinBlue) to Happyforms
It’s time to connect Brevo and Happyforms now that they are both set up. Follow these steps to connect the two:
Step 1: Login to your Brevo account then select your account at the upper right.
Step 2: Navigate to SMTP & API > API Keys. Then generate a new key if you don’t have one.
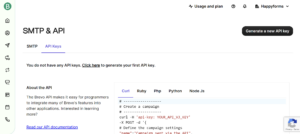
Step 3: Name your API Key.
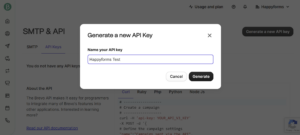
Step 4: Copy the API Key that you’re going to use.

Step 5: Return to the WordPress dashboard and select Forms > Integrations. After entering your API v3 Key, click “Save Changes”.

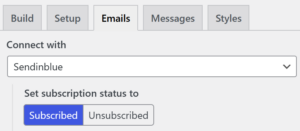
Step 6: Go to Emails > Connect with SendinBlue in the Happyforms Contact Form. Additionally, you can indicate whether the user will be subscribed. Do not forget to click “Update”.
Testing Out Your Form
Testing guarantees that the integration is operating as intended. To ensure that everything works as it should, you must test your integrated form before launching it.
Step 1: Add the form to a text page or post on WordPress.
Step 2: Use your website to submit a test form.
Step 3: Verify whether the contact details have been added to the chosen email list by logging into Brevo.
Step 4: To resolve any problems, check the mapping and settings.
Conclusion
Simplifying your contact management and email marketing may be achieved quickly and effectively by integrating Brevo with Happyforms. You can quickly expand and interact with your audience by fusing the powerful features of Brevo with the easy-to-use features of Happyforms.
For more integration tips and insights, remember to read our previous blog post on Integrating SendFox to Happyforms.
Check out our blog post on 5 Ways to Increase WordPress Site Speed This 2024 if you desire a more effective and productive workflow.
