One clever strategy for effectively managing your subscribers is to integrate your forms with an email marketing platform such as SendFox. By integrating SendFox with Happyforms, form submissions may be automatically added to your email lists, which can improve engagement and automate your workflow. We’ll take you step-by-step through the integration process to make sure you’re prepared for success!
Table of Contents
- Installing Happyforms
- Creating a SendFox Account
- Integrating SendFox to Happyforms
- Testing Out Your Form
Installing Happyforms
Installing the Happyforms Pro plugin on your WordPress website is necessary before you can begin.
Step 1: After logging in, navigate to the Plugins section of your WordPress admin panel.
Step 2: Go to Add new Plugin > Upload Plugin. After choosing Happyforms Pro, click Install.
Step 3: Make sure to activate the plugin.
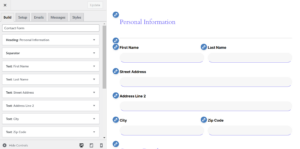
Step 4: You can create your contact form or use the Happyforms template; if you want to use the template, follow this guide.

Creating a SendFox Account
Here’s how to create a SendFox account if you don’t already have one:
Step 1: Go to SendFox’s website.

Step 2: After selecting Sign Up, provide your information, including your password and email address.

Step 3: Confirm your account through the verification email.
Step 4: After logging in, click Lists and select Create List to start your first email list.
Step 5: Create a list and name it.
Now that you have your SendFox account ready, let’s connect it to Happyforms.
Integrating SendFox to Happyforms
Now that Happyforms and SendFox are both configured, it’s time to connect them. To connect the two, follow these easy steps:
Step 1: Log in to your SendFox account.
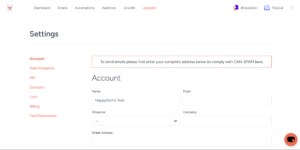
Step 2: Create a SendFox Personal Access Token. For further instructions, follow this guide created by SendFox.
Step 3: You will require the token for the integration, so make a copy of it.
Step 4: Go back to the WordPress dashboard and choose Forms > Integrations. Enter your Personal token then hit save.

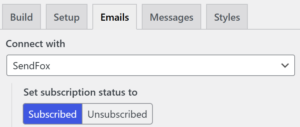
Step 5: In the Happyforms Contact Form, go to Emails > Connect with SendFox. You can also specify if the user will be subscribed or not. Remember to hit “Update.”

Testing Out Your Form
It’s essential to test your integrated form before launching it to make sure everything functions properly.
Step 1: Include the form in a WordPress post or page.
Step 2: To make sure the form displays properly, preview the page.
Step 3: As a user, complete the form and send it in.
Step 4: Examine the SendFox dashboard to ensure that the submission went through.
Step 5: Make sure the test entry initiates any automated responses from your email automation set up in SendFox.
Conclusion
You’ve given your website a strong tool to easily gather and manage contacts. Easily expand your subscriber list and optimize your email marketing operations by integrating SendFox with Happyforms.
For a detailed tutorial on integrating Happyforms with other email programs, such as SendGrid, you can visit this blog. To find practical methods for successfully monetizing your WordPress website, check out our blog post on 10 Proven Ways To Earn Money In WordPress 2024.
