Your contact and lead generation forms can be greatly improved by integrating Happyforms with ActiveCampaign, which also makes advanced customer relationship management and automated email follow-ups possible. Everything from installing Happyforms to testing your form interaction with ActiveCampaign will be covered in this article. Let’s get started!
Table of Contents
- Installing Happyforms
- Creating an ActiveCampaign Account
- Integrating ActiveCampaign with Happyforms
- Testing Out Your Form
Installing Happyforms
Ensure Happyforms is installed and activated on your WordPress website before configuring the integration.
Step 1: Go to your WordPress dashboard.
Step 2: In the plugins section, click upload, then select the Happyforms Pro that you bought.
Step 3: Activate your plugin.
Step 4: Create your contact form, or you can use the template at the Happyforms site, if you will be using the template check out this guide.
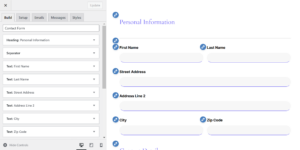
Tip: Become familiar with the form-building interface of Happyforms. Creating custom forms with fields that collect crucial data for your ActiveCampaign automation will be simpler with the drag-and-drop editor.
Creating an ActiveCampaign Account
You can manage your leads and automate follow-ups using ActiveCampaign, a powerful CRM and email automation tool. If you haven’t already, follow these steps to establish an account:
Step 1: Visit ActiveCampaign and click on “Get Started.”
Step 2: Sign Up for a Free Trial or a Subscription Account.
Step 3: Familiarize yourself with ActiveCampaign’s dashboard, focusing on lists, tags, and automations.
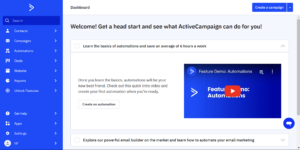
Tip: To keep leads organized, make a unique contact list just for Happyforms submissions.
Integrating ActiveCampaign with Happyforms
Let’s now connect Happyforms and ActiveCampaign so that form submissions are immediately sent to ActiveCampaign.
Step 1: In ActiveCampaign, go to Settings > Developer to locate your URL and API Key.
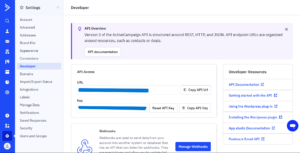
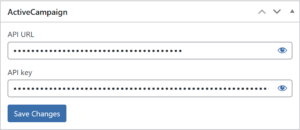
Step 2: Head back to the WordPress dashboard then Forms > Integration, find ActiveCampaign then paste your URL and API key make sure to save changes.
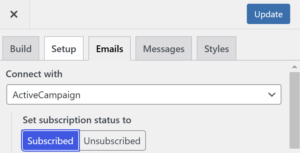
Step 3: Go to your Happyforms Contact Form > Emails > Connect with ActiveCampaign, you can also specify whether the user will be subscribed or unsubscribed. Don’t forget to hit update.
Tip: Always double-check your configurations.
Testing Out Your Form
Testing is necessary to ensure that everything is functioning properly after the integration is in place.
Step 1: Go to the page or post where your form is embedded.
Step 2: Submit a test entry.
Step 3: Verify that your test entry appears with the correct information on your ActiveCampagin list.
Step 4: If you’ve set up automation check if it triggers correctly.
Tip: Verify new submissions in ActiveCampaign on a regular basis to make sure the data is syncing properly. By taking this step, data entry problems can be avoided and a smooth information exchange between Happyforms and ActiveCampaign can be guaranteed.
Conclusion
A flawless system that automatically collects and manages leads saves you time and improves your ability to communicate with potential clients. By integrating ActiveCampaign with Happyforms, you can automate your lead collecting and provide strong automation for nurturing contacts. To further increase your possibilities if you’re interested in integrating Happyforms with other platforms, see our blog on connecting with Mailchimp.
