
A newsletter can be a powerful conversion tool if it is well-planned, targeted, and provides value to your subscribers. Despite the quality of your newsletter though, if your newsletter signup form fails to perform well, you could risk losing a significant number of subscribers. So what makes for an effective newsletter signup form? Let’s look in more depth.
Effective newsletter signup forms: a checklist
Here are some tips for creating a form that encourages visitors to subscribe to your newsletter:
- Keep it simple: A newsletter signup form should be easy to use and not require too much information. Ask for only the essential information you need, such as the user’s email address and first name. Avoid asking for too many details, as it can discourage visitors from signing up.
- Make it prominent: Place the signup form in a prominent location on your website, such as in the sidebar, footer, or as a pop-up. Use contrasting colors, bold text, or an eye-catching design to draw attention to the form.
- Use compelling copy: Use copy that clearly explains the benefits of subscribing to your newsletter. Highlight what subscribers can expect to receive and why it’s worth their time to sign up. Use action-oriented language, such as “Sign up now” or “Get exclusive content,” to encourage visitors to take action.
- Provide an incentive: Offer a free incentive, such as an ebook, whitepaper, or discount code, to encourage visitors to sign up. Make it clear what subscribers will receive by signing up and how they can access the incentive.
With the basics out of the way, let’s see how you can set it all up on your WordPress site.
Setting up a newsletter signup form the usual way
The first step, obviously, is to choose a newsletter service: select a newsletter service that suits your needs and budget. Some popular newsletter services are Mailchimp, Constant Contact, Campaign Monitor, AWeber, and ConvertKit.
Adding a newsletter to a WordPress website can then be done in several ways:
- Use a plugin: Many email marketing services offer plugins or integrations with WordPress that make it easy to add newsletter sign-up forms to your website. For example, Mailchimp, Constant Contact, and ConvertKit offer this feature.
- Directly embed the signup form: Almost every email marketing service allows you to configure your signup form, copy its HTML code, and paste it into your posts or pages.
Both approaches work well for simple scenarios, but each has its downsides:
- Dedicated plugins are often limited by the features provided by the platform. In most cases, email marketing services only offer very basic form-building options.
- Embedded signup forms suffer from the same limitations, with the additional drawback that they cannot be easily managed from a single location in your dashboard. The code is instead spread across posts and pages.
In the next chapter, we will explore a better way to create a newsletter signup form: using Happyforms to build your form and integrating it with your email marketing service through one of our dedicated integrations. Happyforms is compatible with all major email marketing services out there.
Setting up a newsletter signup form the Happyforms way
To enable Happyforms to communicate with your email marketing service, you’ll first need to authenticate it with that service. While most services require only an API key, some may have more specific authentication procedures. You can refer to our integration guide and follow the steps relevant to your particular service. In this guide, we’ll be using Mailchimp.
After authenticating with your email marketing service, you’re ready to move on to the next step: building the form.
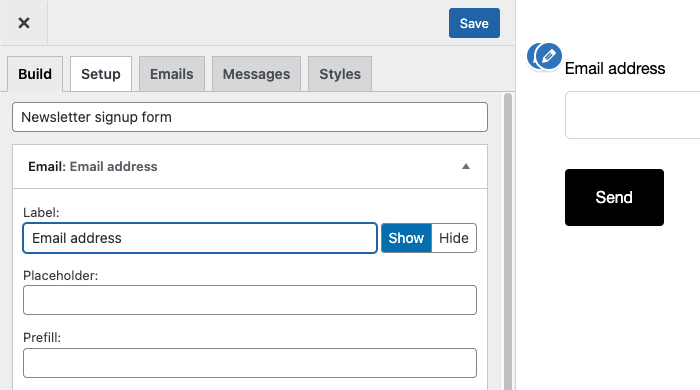
Create a new form, give it a descriptive name, and add an Email field to it.
Switch to the Emails tab, and pick your email marketing service in the Connect with dropdown. Then select the mailing list you want to add subscribers to in the List to add submitter’s email to dropdown.
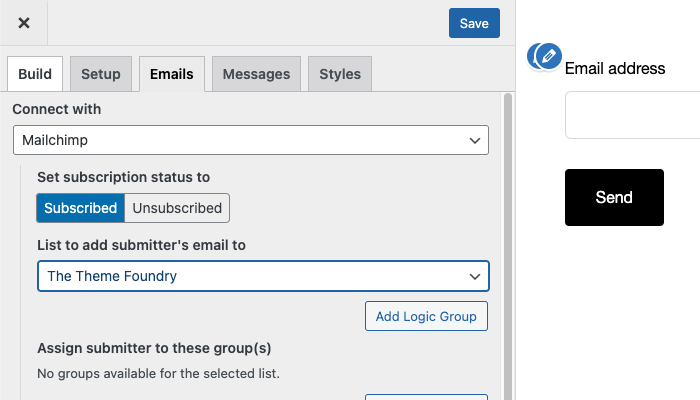
With Happyforms, you have the option to turn your subscribe form into an unsubscribe form if desired, and you can also choose to add tags to new subscribers or enable email opt-in. The availability of these additional features depends on the email marketing service you are using.
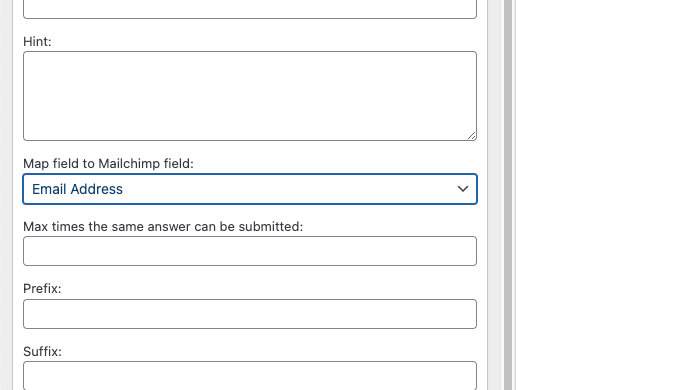
Switch back to the Build tab, and select Email Address in the Map field to Mailchimp field dropdown of your Email field.
Save your form. Done!
Reviewing our work
That was easy, wasn’t it? Now, let’s review the checklist at the beginning of this article and see if we can tick all the boxes:
- Keep it simple: The form we just created is the absolute minimum you need. You could, however, ask for the first and last name or phone number, just make sure to map them in the same way you mapped your email field. Keep in mind that the more you add, the more demanding your form becomes.
- Make it prominent: You can add Happyforms forms everywhere on your site – as blocks in the block editor, embed them in classic posts through our shortcode, or in a sidebar or footer with our dedicated widget.
- Use compelling copy: Paragraph fields are perfect for this. You can add informative text and even links to your exclusive content landing pages.
- Provide an incentive: This is entirely up to you and depends on the kind of incentive you’re offering.
That concludes this post. We haven’t covered paid newsletter subscriptions yet, but that’s the subject of another article.