You can enhance your email interactions straight from your WordPress forms by integrating Twilio’s SendGrid with Happyforms. Automating email distribution can send confirmation, updates, and marketing communications to your audience more efficiently. This tutorial shows you how to quickly and easily set up and integrate SendGrid with Happyforms.
Table of Contents
- Installing Happyforms
- Creating a SendGrid Account
- Integrating SendGrid to Happyforms
- Testing Out Your Form
Installing Happyforms
Ensure Happyforms is installed and operational on your WordPress website before configuring the integration.
Step 1: Go to the Plugins area of your WordPress admin panel after logging in.
Step 2: Head to Add New Plugin > Upload Plugin. Select the Happyforms Pro version and hit install.
Step 3: Activate the Happyforms plugin.
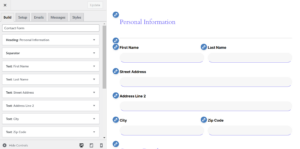
Step 4: You can use the Happyforms template or make your contact form; if you want to use the template, follow these instructions.
Creating a SendGrid Account
SendGrid, a cloud-based email delivery service, guarantees reliable and scalable email communication. Together, let’s create your SendGrid account.
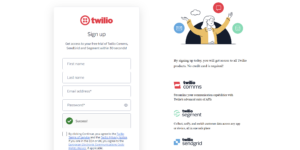
Step 1: Visit SendGrid’s Website and click “Start for Free.”

It will lead you to the Twilio account creation page.
Step 2: Verify your account by checking your mailbox for a SendGrid verification email.
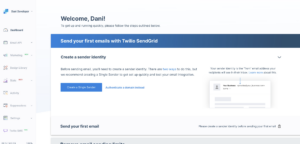
Step 3: In the SendGrid dashboard, select “Sender Authentication” and enter your sender email or domain.
Step 4: Navigate to Settings > API Keys and click Create API Key.
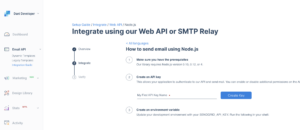
Step 5: To connect Happyforms later, you’ll need the generated API key, so save it.
For a more in-depth guide, explore this official SendGrid tutorial. It provides detailed instructions for using SendGrid effectively.
Integrating SendGrid to Happyforms
It’s time to connect Happyforms and SendGrid now that they are both configured.
Step 1: Find your API Key in SendGrid, go to Settings > API Keys. Find the appropriate API Key then copy it.
Step 2: Return to the dashboard of WordPress and select Forms > Integrations. Locate SendGrid, enter your API key, and click Save.

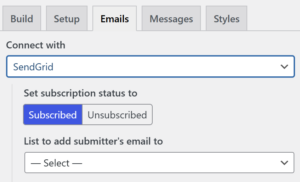
Step 3: Navigate to Happyforms Contact Form > Emails > Connect with SendGrid. You can also specify whether or not the user will be subscribed. Don’t forget to select “Update.”
Testing Out Your Form
Testing is necessary when the integration is finished to make sure emails are being sent correctly.
Step 1: Make a test form in Happyforms and submit it.
Step 2: Verify that the recipient receives the test email in their inbox.
Step 3: Check the email’s content, sender information, and format.
Step 4: Review the SendGrid Dashboard.
Step 5: Change the WP Mail SMTP settings to fix any problems, like deliverability failures.
Conclusion
By integrating SendGrid with Happyforms, you can reliably communicate with your audience and efficiently manage email alerts. You can improve user engagement and expedite email delivery with this setup. We also have a useful article on integrating Happyforms with Email Octopus, which you can read here if you’re interested in learning more about your integration choices. To take full advantage of Happyforms’ potential, see our blog post on 5 Hidden Happyforms Features for additional information.
