In this article, we will demonstrate a straightforward method to set up conditional redirects for your form submitters based on their input. The best part is that you can accomplish these steps without any coding knowledge, and it will take less than 5 minutes to complete. Let’s dive right in and get started!
- Why use conditional redirects on your WordPress form
- Step 1: Using the right WordPress form plugin
- Step 2: Create a form with a choice-type field
- Step 3: Add choices to your Radio field
- Step 4: Add conditional logic for redirection after form submission
- Step 5: Test your form
- Adjusting the redirection delay
Why use conditional redirects on your WordPress form
Conditional redirects enhance the interactivity of your form by customizing the response according to the form submitter’s input. This enables you to display relevant information that directly benefits users. When users are directed to the correct page after submitting the form, it captures their attention, providing a visual and precise answer to their needs. This can greatly aid in lead generation and boost the chances of successful conversions.
Step 1: Using the right WordPress form plugin
When it comes to creating conditional redirects in WordPress, there are numerous form plugins available that can do the job. In this guide, we’ll be using the pro version of Happyforms. Selecting the appropriate WordPress form plugin is very important when building something with WordPress. A reliable form plugin with the right features can be highly beneficial in the long run, requiring less effort and conserving valuable resources. Let’s get started with Happyforms to set up our conditional redirects!
For this step, we’ll just need to download and install Happyforms, then register your copy once you already successfully registered for an account.
Step 2: Create a form with a choice-type field
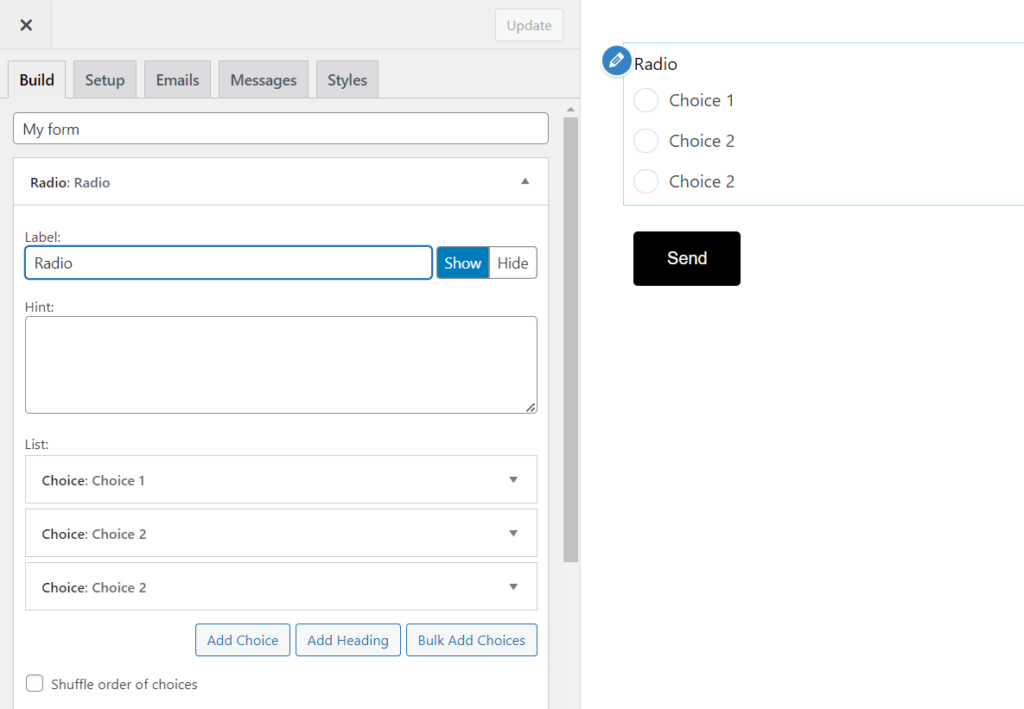
Simply navigate to the Form → Add New screen. Next, add a choice-type field, such as a Dropdown, Radio, or Checkbox field, which allows form submitters to choose from pre-defined options. In this example, we’ll use a radio field. Once we’ve added the choices to the radio field, we’ll also define the corresponding URLs for each choice in the upcoming steps.
Step 3: Add choices to your Radio field
In this step, we will add choices to our Radio field in Step 2. For each choice, we’ll then later assign a corresponding URL so that form submitters will be redirected to a specific page based on their selection in the Radio field. This way, their choice will determine where they are redirected to after submitting the form.
Step 4: Add conditional logic for redirection after form submission
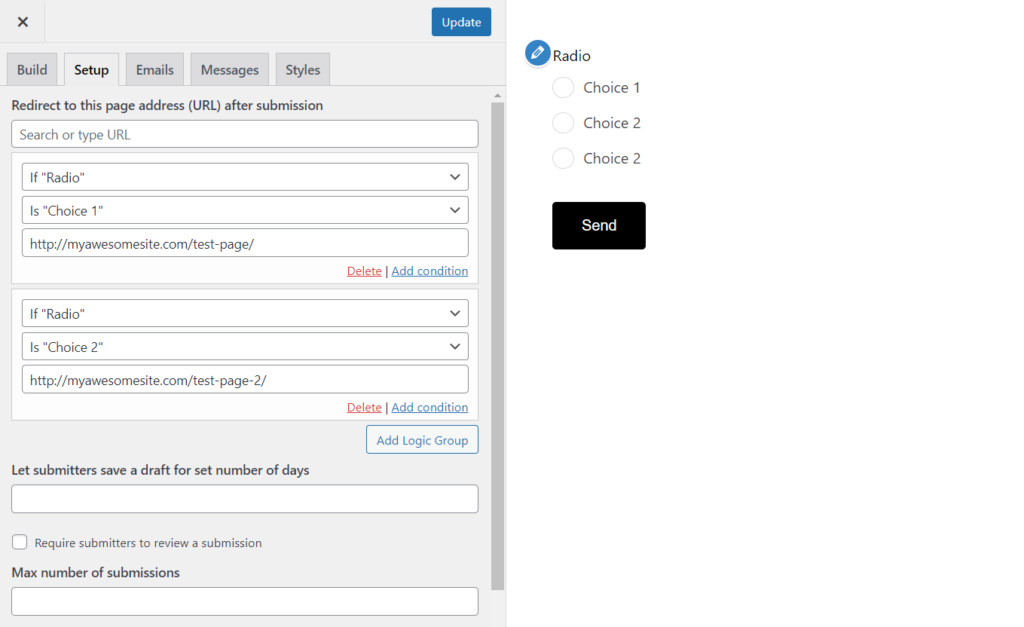
To set up conditional redirects based on your radio choices, head to the Setup tab of your form builder. Click the Add logic group button, which will bring up the logic group section. In the logic group section, you can link your radio choices to corresponding URLs, for example, “If the user chooses option 1, then redirect to this URL.” The URL can be within your website or an external link. Once you have configured the logic group with the desired choices and URLs, don’t forget to click the Update button to save your changes.
Step 5: Test your form
And that’s all you need to do for conditional redirection on your forms. The final step is to test it and see how it works. Try selecting different choices and then submit your form; it should automatically redirect to the corresponding URL based on the choices you’ve made. This way, you can ensure that your conditional redirects are functioning correctly and providing the desired user experience. Happy testing!
Adjusting the redirection delay
If you’re not satisfied with the default delay time for redirection to a particular URL, you can easily customize it using a hook. Simply change the value of $seconds to your preferred number of seconds for the delay. This way, you can have full control over the redirection timing.
Add this to your theme’s function.php file or you can use a plugin like Code Snippets.
add_filter( 'happyforms_submission_redirect_after', function( $seconds ) {
    $seconds = 0;

    return $seconds;
}, 20 );