
You chose WordPress because of its user-friendly interface. It only takes a few clicks to create a website and make it available to the world. However, now you need a way for customers to get in touch with you, and you’re not sure how to add a contact form. While a contact form is a crucial element for most businesses, WordPress, unfortunately, does not have a built-in feature for creating contact forms.
You added your email address and a selfie to your contact page to save time. But is this the easiest way for customers to contact you? Are you truly saving time for yourself or for your customers?
In this article, we’ll discuss the benefits of using a contact form and guide you through the steps of adding one to your WordPress page.
Why use a contact form?
Is a contact form really necessary? Yes, it is! Using a contact form can save you time in the long run. Not only that, it has many advantages compared to just pasting your email address on your contact page.
Here are the advantages of using a contact form.
- Spam protection – While adding your email address to your contact page takes only a second or two, it’s actually an open invitation for spammers. Your email address is hidden with a contact form, and spammers can’t mine it. So, you don’t need to worry about filtering the spam and scam messages in your inbox.
- Easier for your site visitors to reach you – Without a contact form, users must copy your email address, open their email app, and compose their email. It’s a multi-step process compared to just typing directly into a form.
- Information collection – With a form, you can add specific input fields to immediately collect important information that you need from your user right on the first email.
- Lead Collection – You can connect a form to your favorite email market service to generate leads for your business.
Now that we know why using a contact form is better let’s walk through the steps to add them to your WordPress page.
Setting up a contact form
Even though WordPress doesn’t have a built-in form feature, adding a contact form to your page is still very easy. All you have to do is install and activate a contact form plugin. Create your form and then add it to your page. That’s all! Simple right?
So now, let’s go through the steps one by one.
Choose a WordPress contact form plugin
There are a lot of free and paid contact form plugins out there that you can choose from. Almost all of these plugins cover the basic functionality. But some only offer the bare minimum, and some offer a few advanced features. So carefully choose the contact form that covers all your needs.
For this walkthrough, we’re going to be using Happyforms. Happyforms offer both a free and paid version. The free version covers a contact form’s basic functionality and offers a few advanced features like non-input design fields. Happyforms also has an interface that blends in with your dashboard. And it has a simple and familiar form builder, which makes building forms easy. You can upgrade to the paid version if you need more advanced features.
Installing a contact form plugin
To install a contact form plugin, log in to your WordPress dashboard and go to Plugins → Add New section. In the search field, type Happyforms and click the “Install Now” button. Wait for it to finish installing, and then click the Activate button.
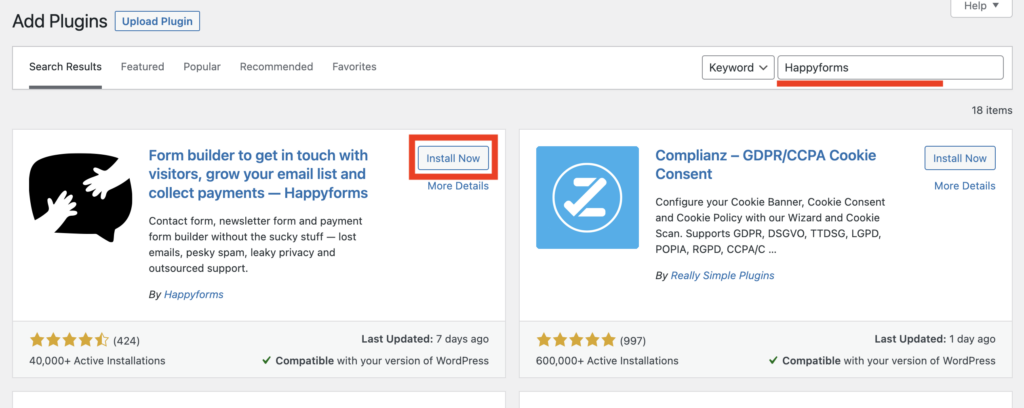
Happyforms should now be activated and ready.
Creating your contact form
When Happyforms is activated for the first time, it automatically creates a sample form. You can use the sample form out of the box or edit it according to your liking. It can be found in the Forms → All Forms screen.
But if you want to create a new form, head over to your WordPress dashboard, then go to Forms → Add new, and you will be taken to the form builder. From there, add the title of your form to identify it easily. Then start adding your form fields.
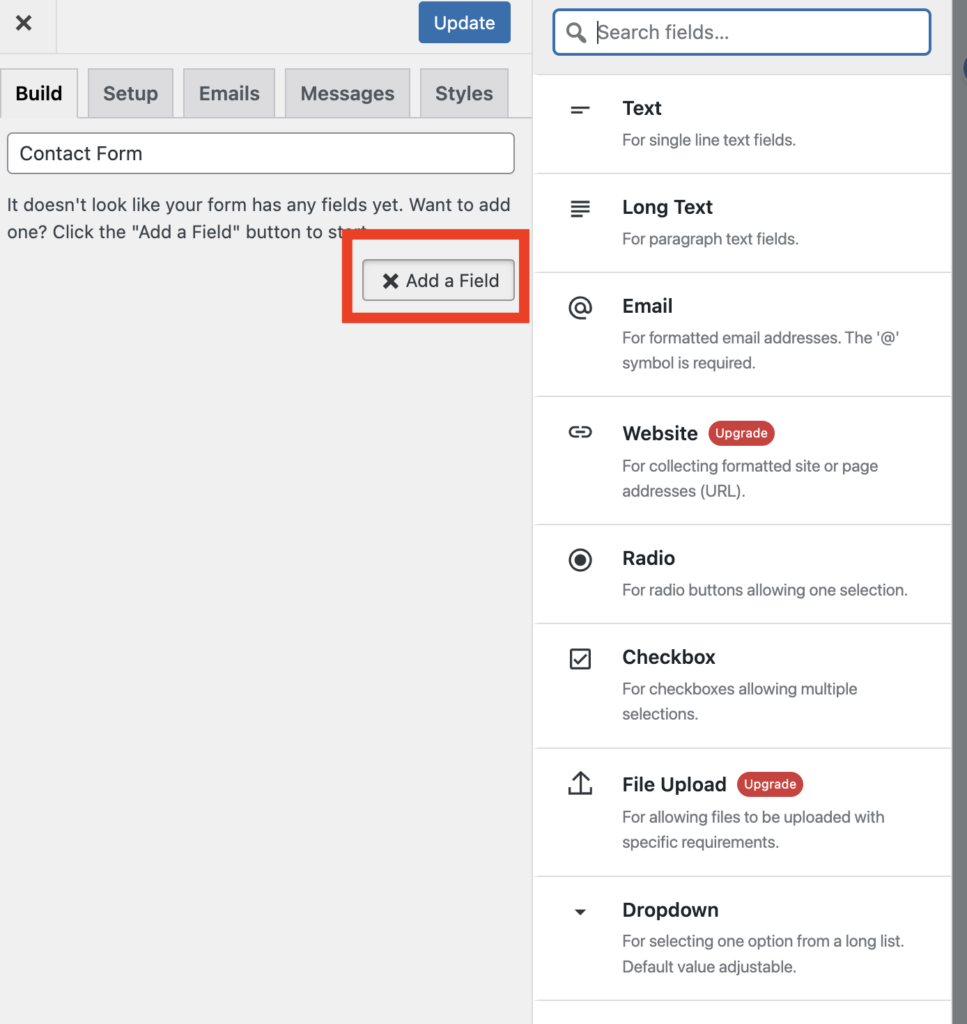
Once you’ve added all the fields you need, click the Update button at the top to save your form.

Setting up notification emails
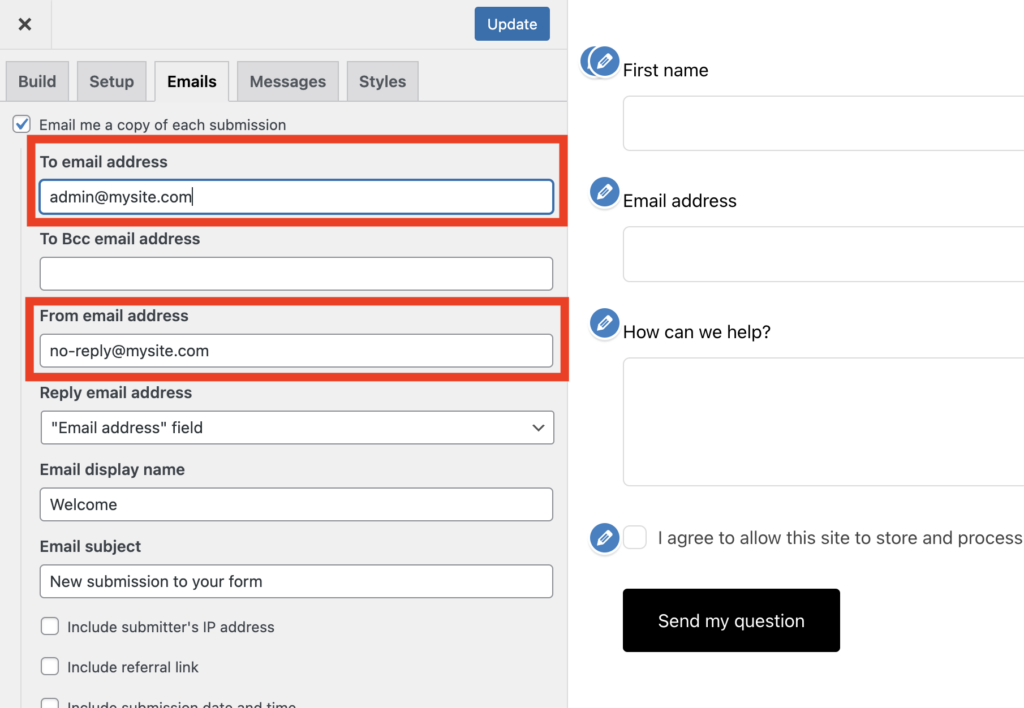
Once your form is complete, it’s important to set up notifications to ensure that you or your website administrator receive alerts when a new submission is made. Happyforms has an email notification feature, which is automatically enabled. You’ll need to add the email address where you want to receive the notifications.
To do this, hop over to the Email tab of your form builder. Under the “Email me a copy of each submission“, set the “To email address” to the address of the notification recipient. Then, in the “From email address” set it to an address that has the same domain as your WordPress site’s domain.
Add a form to your WordPress page
Now that your form is all set up and ready to go, it’s finally time to add it to your WordPress page. There are two ways to add it: via a shortcode or through WordPress page builder blocks.
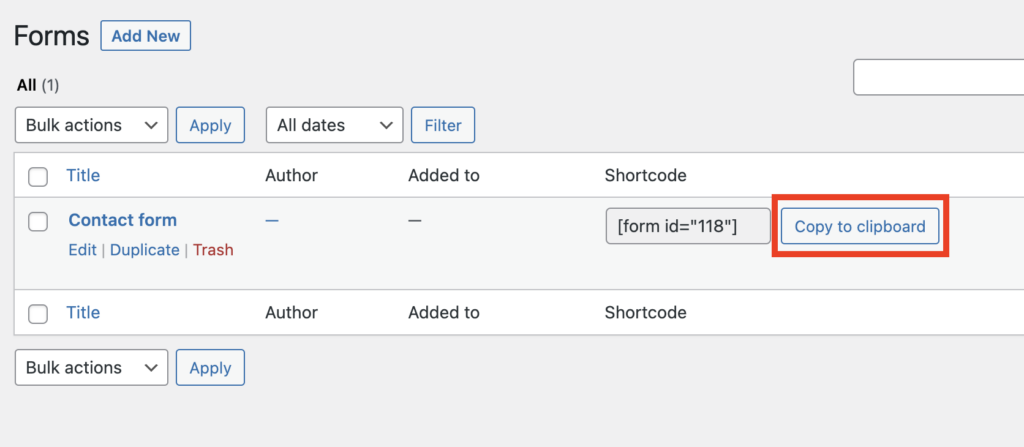
If you’re using a 3rd party page builder, you probably need to use a shortcode to add the form to your page. To get the shortcode, head to your WordPress dashboard’s Forms → All Forms screen. From there, you will see a Shortcode column. Just click the Copy to clipboard button.
If you’re using the default WordPress page builder, you can easily add the form to your page with the help of the Happyforms form block.
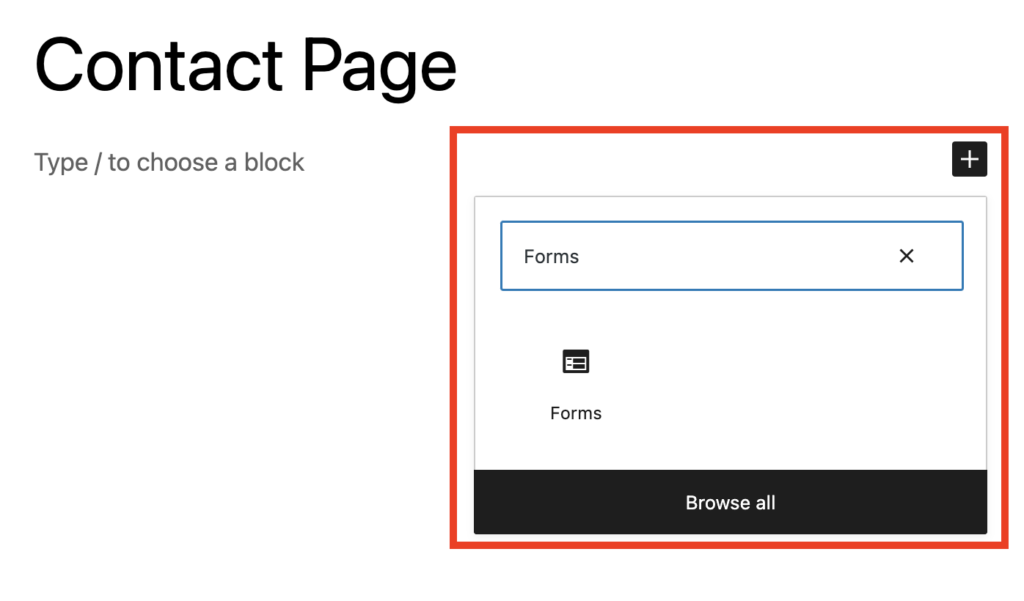
In your page builder, click the + Block Inserter, search for Forms, then click the Forms block.
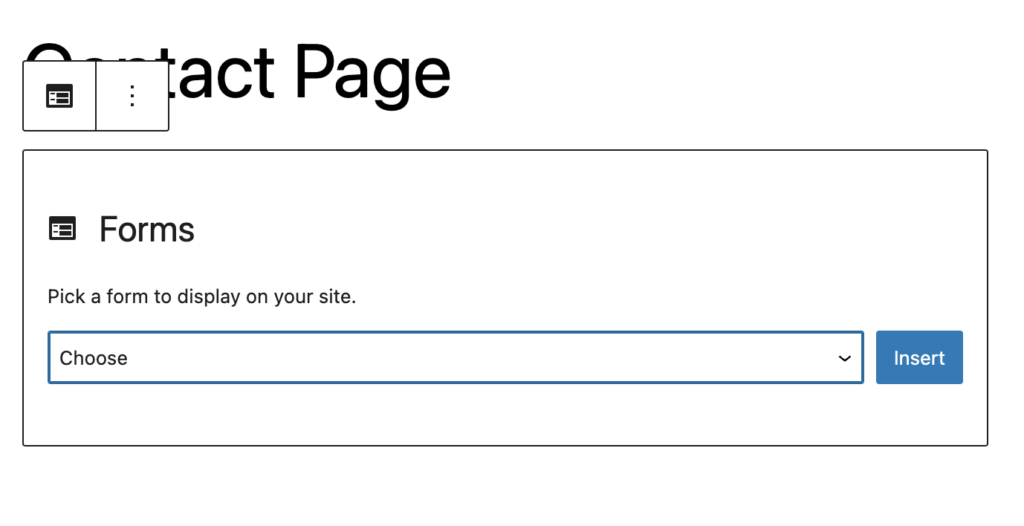
The Happyforms block will appear, asking you to choose which form to display on that page. Select the form that you want to display. And then, click the Publish or the Update button to save the page.
With that, your form is officially published. You can now view it from the front end of your website.
We hope this helps you add a contact form to your WordPress page.