
Integrating your Happyforms plugin with Integrately allows you to easily connect it to thousands of applications. This integration guarantees a smooth workflow by automating processes and saving you time. In this guide, we’ll walk you through utilizing this powerful combination.
Table of Contents
- Installing Happyforms
- Creating An Integrately Account
- Integrating Integrately to Happyforms
- Testing Out Your Form
Installing Happyforms
Make sure Happyforms is correctly configured and activated on your WordPress website before integrating with Integrately.
Step 1: Log in to your WordPress Dashboard
Step 2: Navigate to Plugins > Add New > Upload Plugin. Select the Happyforms Pro plugin file you got after purchasing.
Step 3: Install and then activate the plugin.
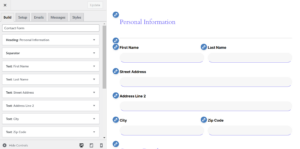
Step 4: If you don’t want to build a form from scratch you can utilize the Happyforms templates, then follow this guide to learn how you can import a form.
Creating An Integrately Account
Integrately connects to multiple apps, including Happyforms, to make tasks easier. If you don’t have an Integrately account yet, follow these steps:
Step 1: Visit the Integrately website to create an account.

Step 2: Fill up the details needed.

Step 3: Log in to your and familiarize yourself with the dashboard.
Integrating Integrately to Happyforms
Now it is time to integrate Integrately with the Happyforms plugins. Here are some steps to follow:
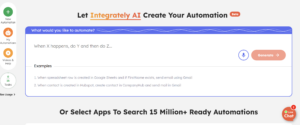
Step 1: Search then select the Happyforms plugin at the Integrately search bar.
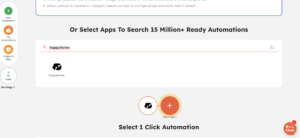
Step 2: Select what automation to activate in Happyforms.
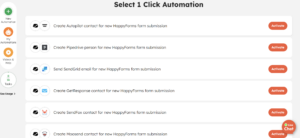
Step 3: Connect your Happyforms account. You can follow the video provided by Integrately for a comprehensive guide.

Step 4: Add a connection to the application you chose.

Step 5: Insert the API that is required.

Don’t worry because Integrately provides video tutorials for further guidance.
Testing Out Your Form
Testing is crucial to confirming its functionality after the integration is complete. Take these steps:
Step 1: Insert your form into your practice page.
Step 2: Fill up the details then submit it.
Step 3: Verify the connected app (such as Mailchimp or Google Sheets) to make sure the data was transferred properly.
Step 4: Review the Integrately setup steps to troubleshoot any issues.
Conclusion
Using Happyforms to integrate with your WordPress website is a great way to automate workflows and optimize procedures. By following a few simple steps, you can save time and concentrate on more important tasks.
For additional helpful advice, see our earlier blog post on integrating Constant Contact with Happyforms, or read the 7 Strategies for Monetizing Your WordPress Site to maximize your website’s potential.