Integrating Drip with Happyforms can revolutionize your email marketing endeavors by automating the lead collection and management process. This tutorial offers a straightforward, step-by-step method for integrating Drip with Happyforms, enabling you to optimize your marketing workflows easily.
Table of Contents
Installing Happyforms
Happyforms was created to make user interactions on your website easier. To begin installing, follow these steps:
Step 1: Log in to your WordPress dashboard.
Step 2: Select Add new Plugin > Upload Plugin. After choosing Happyforms Pro, click Install.
Step 3: Don’t forget to activate your plugin.
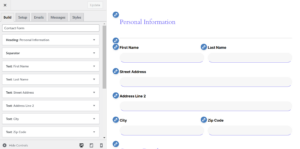
Step 4: Lastly, you can use the Happyforms template, which you can accomplish by following these steps.

Once activated, Happyforms will be available in your WordPress dashboard menu, allowing you to create custom forms.
Creating a Drip Account
Drip is a powerful email marketing automation tool that’s ideal for lead generation and e-commerce. Follow these steps to create an account if you don’t have one:
Step 1: Go to the Drip Website then create a new account.

Step 2: Enter your email address to register, then choose a strong password. 
Step 3: Provide information about your company to finish the onboarding process.
Step 4: Create a new Workflow and a subscriber list.

Step 5: Get acquainted with the features and dashboard of Drip.
Integrating Drip to Happyforms
Now that Happyforms and Drip are both configured, it’s time to connect them. Take these steps to integrate the two:
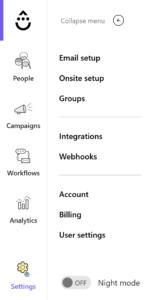
Step 1: Go to your Drip account then get your API Token.
Step 2: Settings > User Settings > API Token then copy it.


Step 3: Return to the WordPress dashboard and select Forms > Integrations. After entering your API Token, click “Save Changes”.

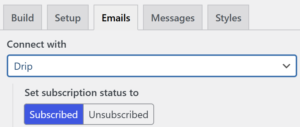
Step 4: Go to Emails > Connect with Drip in the Happyforms Contact Form. Additionally, you can indicate whether the user will be subscribed. Do not forget to click “Update”.

Testing Out Your Form
Testing ensures the integration is functioning as planned. Before deploying your integrated form, you must test it to make sure everything functions as it should.
Step 1: Put the form on your WordPress website’s page or post.
Step 2: As a test user, complete the form and send it in.
Step 3: Make sure the details have been added to the subscriber list you have chosen by logging into Drip.
Step 4: Examine the API key, mapping, and settings in Happyforms and Drip to troubleshoot any difficulties.
Conclusion
You can easily gather and arrange leads by connecting Drip with Happyforms, opening the door to more successful email marketing campaigns. You may save time and concentrate on interacting with your audience by using this easy setup.
Lastly, for another helpful integration guide, don’t forget to visit our blog on Integrating Brevo with Happyforms. To stay ahead of the curve when it comes to using WordPress for the success of your website, read our post on Must-Know Features in WordPress Updates 2024 for even more insights.
