In this article, we’ll walk you through a simple method to automatically use URL query parameters as your form field values. By visiting the URL with the designated query parameters, you can effortlessly incorporate them into your form.
At Happyforms, we’ve got this cool method that can do a bunch of things. The best part? You don’t need to be a coding wizard to pull it off. In this guide, we’re jazzing it up a bit by using a third-party plugin to make your life even easier. Ready to roll? Let’s kick things off with the first step!
Step 1: What plugins are we going to need?
We’re going to roll out the plugins we’ll be using in this guide. First up, there’s the Code Snippet plugin, and of course, our Happyforms plugin. Simple as that! The Code Snippet plugin has a free version, and for Happyforms, we’ll be using the upgraded version. Just install and activate these plugins!
Step 2: The URL for testing
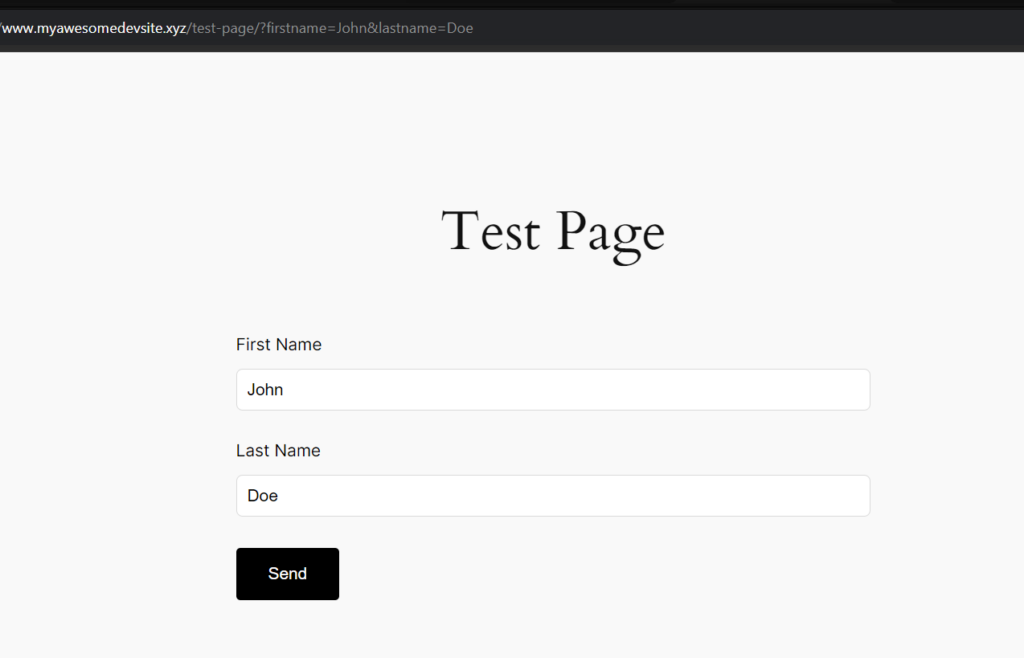
Now, let’s get ready for the URL we’ll use for testing. In this guide, we’re keeping it simple with myawesomedevsite.xyz/test-page?firstname=John&lastname=Doe. Just make sure you’re pointing to the right page where your form is at, and check that you’ve got the correct parameter names in your URL (like firstname and lastname), along with the test values of your choice(John, Doe).
Step 3: Add this custom code
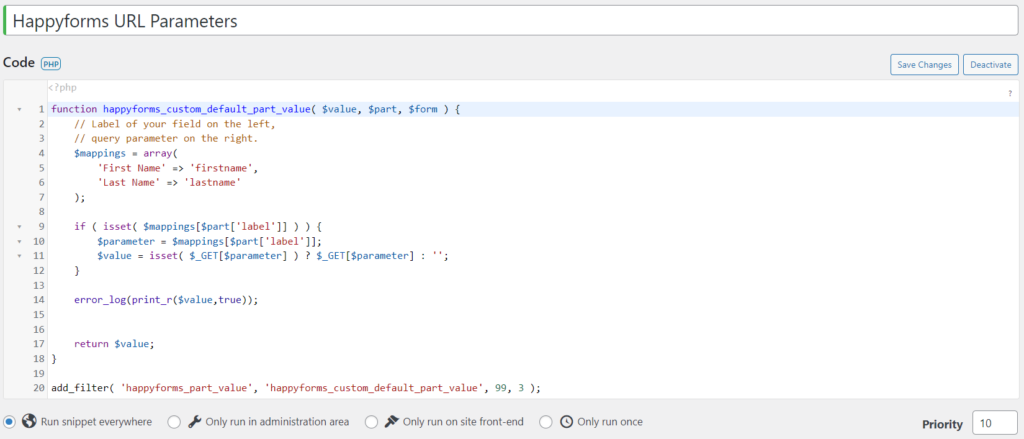
With the Code Snippet plugin activated, head to Snippets → Add New, we’re going to create a new snippet. Then, add this at the code section of the screen:
function happyforms_custom_default_part_value( $value, $part, $form ) {
    // Label of your field on the left,
    // query parameter on the right.
    $mappings = array(
        'First Name' => 'firstname',
	'Last Name' => 'lastname'
    );

    if ( isset( $mappings[$part['label']] ) ) {
        $parameter = $mappings[$part['label']];
        $value = isset( $_GET[$parameter] ) ? $_GET[$parameter] : '';
    }

    return $value;
}

add_filter( 'happyforms_part_value', 'happyforms_custom_default_part_value', 99, 3 );
Customize entries in the $mappings array at the top by matching the label of the field you want to pre-fill with the name of the URL parameter holding the value.
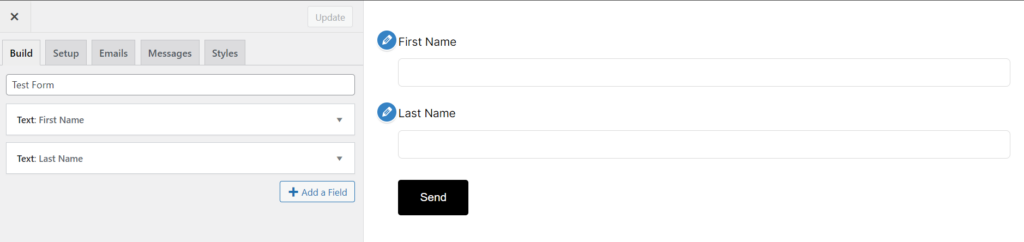
Step 4: Create your form
Now, let’s create your form using Happyforms. Just head over to Forms → Add New screen, and just add the fields you’ll need to automatically populate values with. In this guide, we’ll use the label for our fields First Name and Last Name.
Step 5: Do some testing
Finally, add the form to a page then visit it. Make sure you’ve used the correct URL, for this guide we’ve used /test-page with the parameters ?firstname=John&lastname=Doe resulting to myawesomedevsite.xyz/test-page?firstname=John&lastname=Doe. Just visit he exact URL and see if your fields got populated. If it is, you got it right and that’s it! You now have a form that automatically populates values based on URL parameters.