In the world of digital marketing, lead generation is key to successful audience building. This means capturing the contact information of potential customers and nurturing them into loyal, paying customers. One common way of doing this is through website forms, like those created in WordPress using a plugin like Happyforms. But once you capture this information, what’s next?
Well, that’s where email marketing software like MailerLite comes into play. This software allows you to send email campaigns to your leads, providing them with valuable information, products, or services. In this article, we will guide you on how to connect WordPress forms, specifically Happyforms, to your MailerLite account.
Step 1: Creating a form
Ready to start? First up, we need a form. This calls for a form plugin that already plays nice with MailerLite.
Happyforms is a perfect pick. It’s super easy to use and has MailerLite in its friend list, which makes it great for gathering info from folks visiting your site. Keep in mind, though, that the MailerLite buddy feature only comes with the premium version of Happyforms.
Getting the Happyforms plugin
If it’s not in your toolkit yet, you can grab the premium version of Happyforms right here. Once you’ve got it, you can install it on your WordPress website by following this handy guide here.
Creating your Form
Once you’ve got Happyforms installed, hover over the “Forms” menu item and hit “Add New” to start creating your form. You’ll get to choose from a bunch of different field options. Give your form a name and tweak the fields to fit what you need (like Name, Email, Phone Number). After you’ve added all the fields you want, don’t forget to save your form.
And just like that, you’ve nailed the first step towards linking your WordPress forms to your MailerLite account!
Step 2: Setting up MailerLite
MailerLite is an email marketing tool that lets you create beautiful emails, manage your subscribers, and track your results. If you don’t have an account yet, you can sign up for free.
Create a new Group
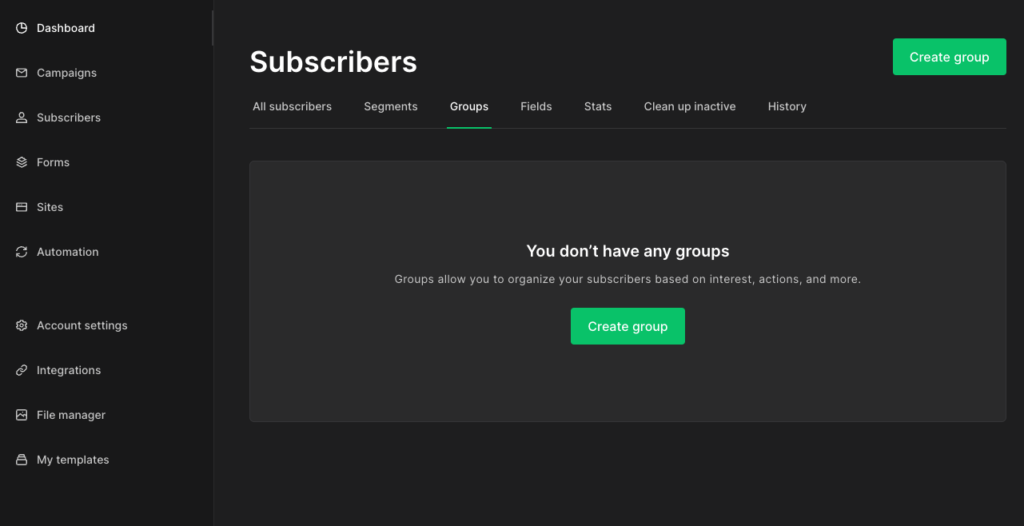
After you log in to your MailerLite account, go to “Subscribers” at the top of your screen, then click on “Groups” tab. Click “Create Group“, then name your group. This will be where your new leads from your WordPress form will go. Creating a group is not required, but it’s preferred so you can better organize your leads.
Get your API key
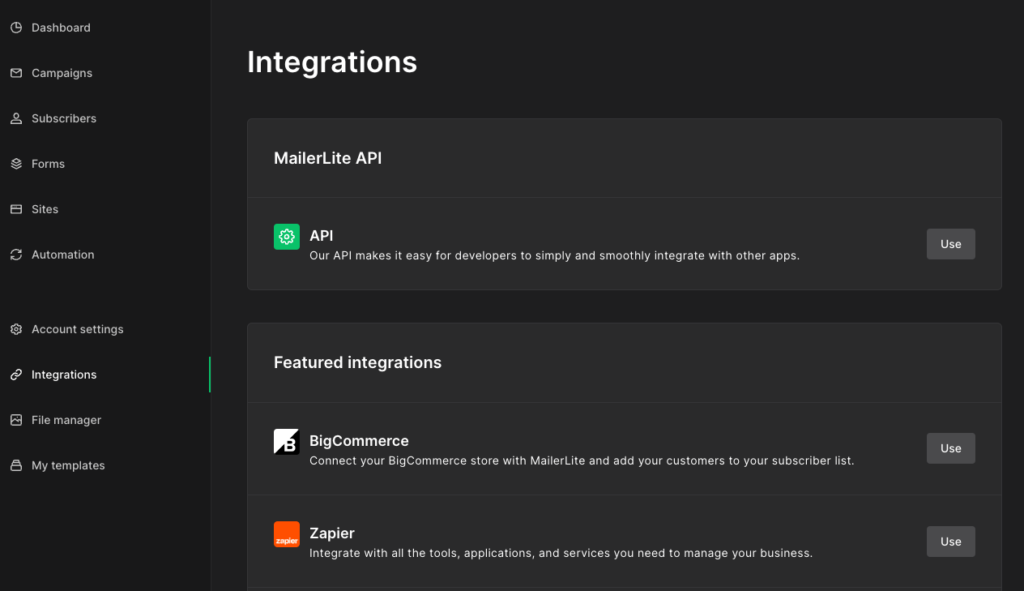
To connect HappyForms to MailerLite, you’ll need your API key. This can be found by clicking on “Integrations” on the left menu bar. Then find and click on the “Use” button under the “MailerLite API“.
Then generate a new token, give it a distinct name, and then make sure to keep a copy of your “API token“. Just to play it safe and prevent any “oops” moments, it’s a smart move to store this somewhere for safekeeping.
Step 3: Connecting Happyforms to MailerLite
Now that you have both Happyforms and MailerLite set up, it’s time to connect the two.
Connecting MailerLite to Happyforms
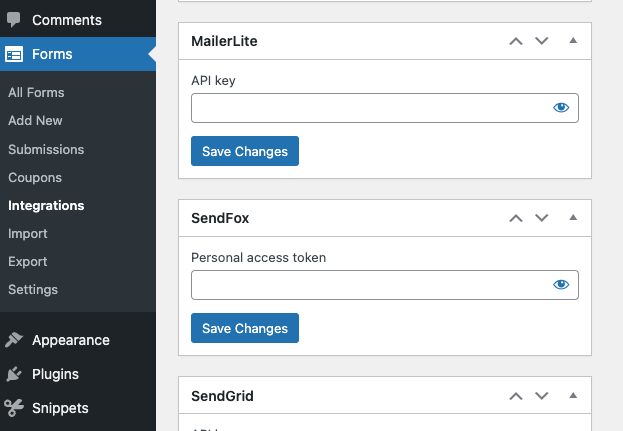
First, navigate to Forms → Integration in your WordPress dashboard. Look for the MailerLite widget, and once found, add your API key into the provided field.
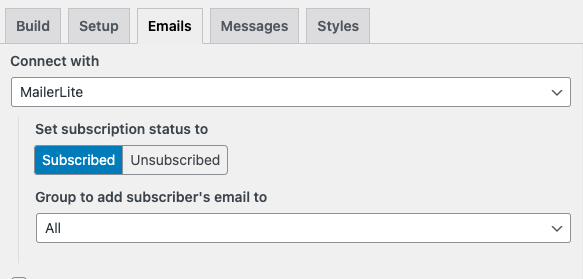
With your API key in place, head over to Forms → “All Forms” section, find the form you’ve previously created, and click “Edit” to launch the form builder. Within the form builder, click on the Email tab. You’ll see a “Connect with” dropdown menu; here, select MailerLite. Set the “Set subscription status to” as “Subscribed” and under “Group to add subscriber’s email to”, choose the group where you’d like your lead’s information to be stored.
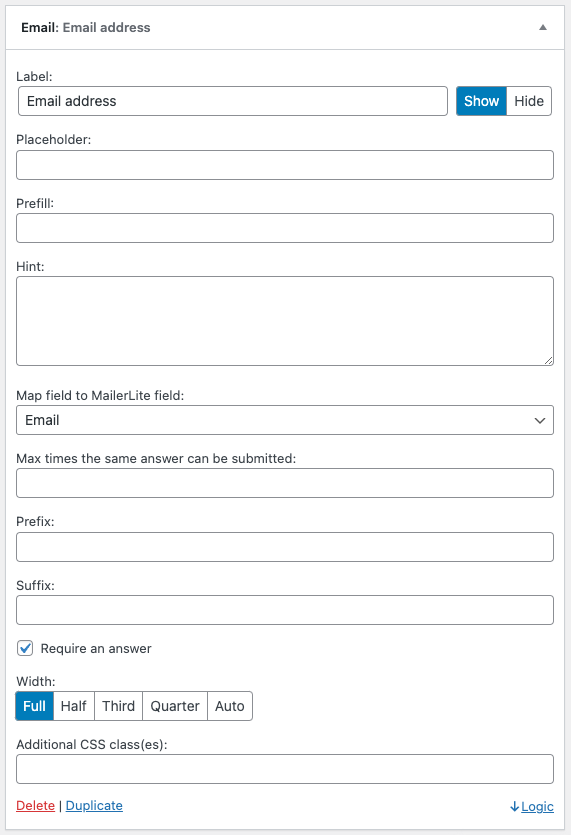
Mapping form fields to MailerLite fields
In this step, your task is to map the fields in your Happyforms form with the corresponding subscriber fields in MailerLite.
It’s strictly required to map your Email field in Happyforms to the email field in MailerLite. This guarantees that your leads will be correctly added to your MailerLite group. While it’s optional, it’s recommended to do the same for other fields (like Name, Phone Number, etc.) for more efficient data management. And remember, once you’ve lined up all your fields, save your form by hitting the “Update” button.
And there you have it! You have now successfully connected your WordPress form to your MailerLite account.
Step 4: Test your form
Before you can start using your form, you should test to ensure everything works correctly. Fill out the form on your website with your information and submit it. Then check your MailerLite group to see if your information has been added. If everything is working correctly, you’re good to go.
Conclusion
Connecting your WordPress forms to your MailerLite account allows you to capture lead information more efficiently and automate your email marketing process. With the Happyforms plugin and MailerLite, you can create beautiful, customizable forms for your website and manage your email marketing campaigns, all in one place.
Whether you’re running an online store, a blog, or any other type of website, understanding how to leverage these tools can be a game-changer for your digital marketing strategy. Follow the steps outlined in this guide, and you’ll have your WordPress forms connected to your MailerLite account in no time.
Remember, the key to effective digital marketing is not just in collecting visitor information, but also in how you use that information to create engaging and personalized content for your audience. Happy form creating, and may your email marketing campaigns be successful!