Creating a form that allows a choice to be submitted a maximum number of times offers versatile utility. This feature enables you to curtail choices to suit your specific form’s objectives. With this, your form becomes more engaging that it prompts submitters to recognize the finite nature of the offered choices. This limitation not only fosters effectiveness but also ensures that the choices hold substantial value within the form’s context.
In this guide, we’ll be using the pro version of Happyforms to create a form that has limited choices. With this WordPress form plugin, this can easily be set up in less than 5 minutes. So, let’s proceed and explore how to achieve this with simplicity!
What are the common uses of limiting choices submissions?
This feature offers a multitude of uses, and we’ll highlight the most common in real-world scenarios to showcase its practical applications.
Product Stock Management. If you’re running an online store, this feature becomes an invaluable tool. It allows you to seamlessly align the choice limits with your product quantities, preventing over-purchasing.
Reservations. Makes the booking process more efficient by employing choice limits. When customers submit a form with their preferred time and date, this feature ensures your reservation-based services avoid overbooking.
That’s just a few of the uses of limiting choices on your form. So let’s jump ahead and start working out on how you could build on this on your forms.
Step 1: Create your form
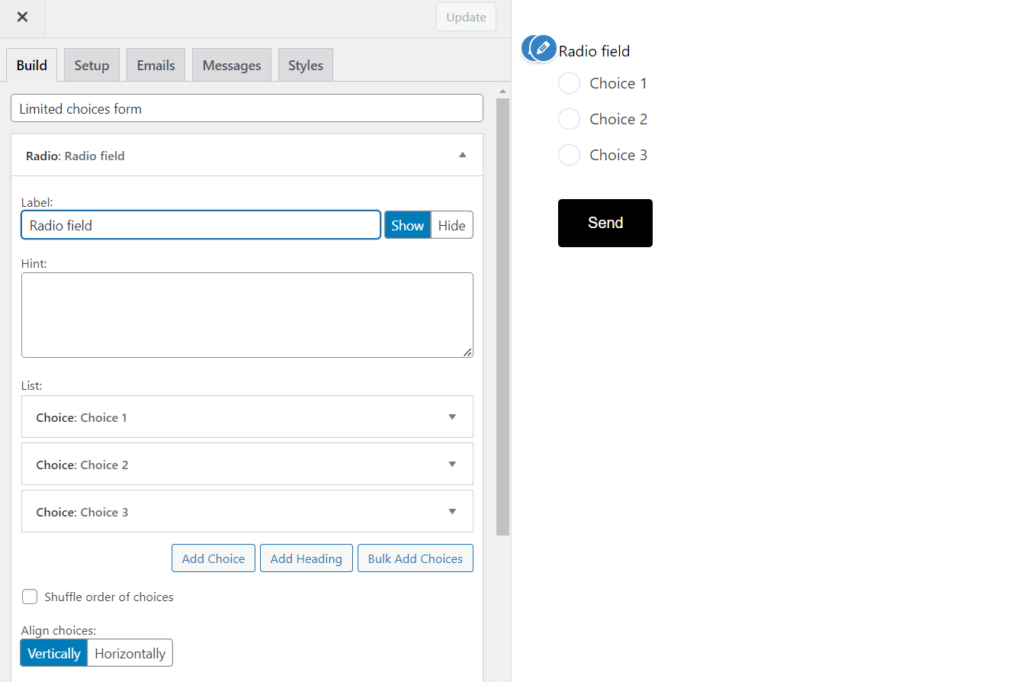
Once you already have the Happyforms paid version, create your first form by heading to Forms → Add New screen. Then, add a title to your form and corresponding fields. Once done, make sure to hit the Save button to save your changes.
Step 2: Add a choice-type field
Incorporate any of these choice-type fields into your form, such as a radio button, checkbox, or dropdown menu. In my example, I’ve included a radio button field. Then next is to populate your field with the available choices.
Step 3: Enable the option to limit choices
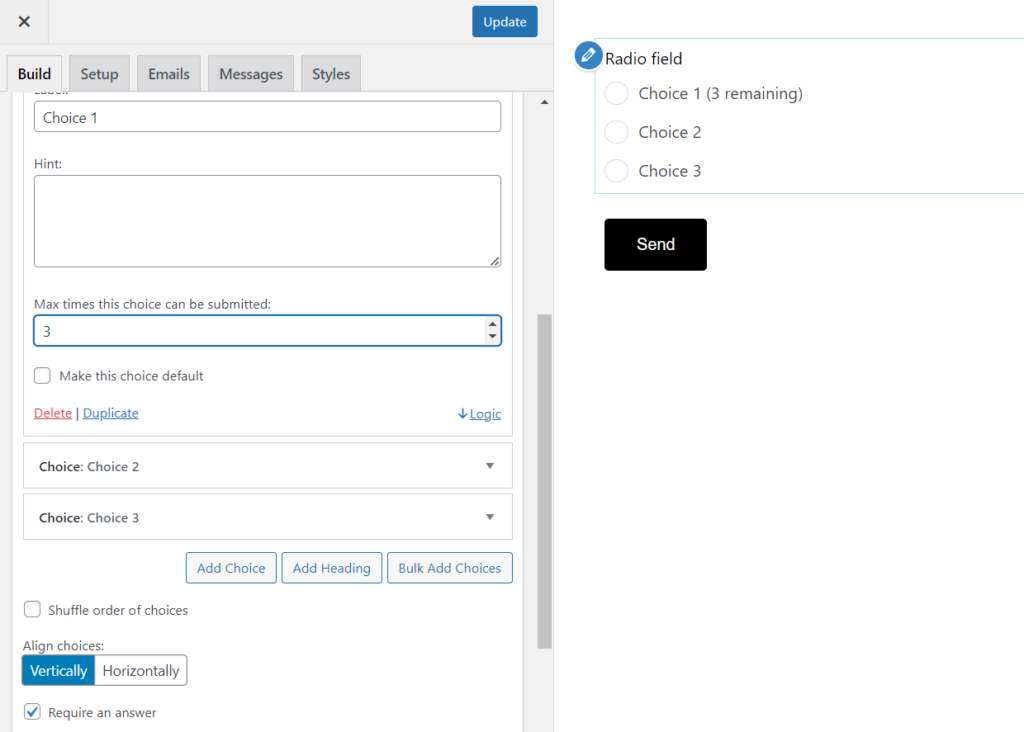
To achieve this, check the checkbox located within the choice-type field for each individual choice. Then, when you expand the specific choice you’re working with, you’ll find the Max times this choice can be submitted: option. Input the desired quantity, which can range from 0 to any large number. Enabling this setting ensures that the choice can only be selected up to the designated submission limit.
Step 4: Test the form
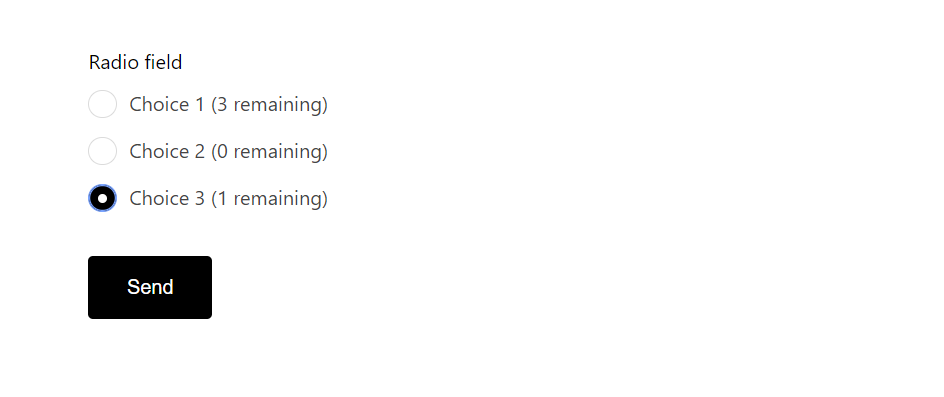
In this step, our objective is to verify that the form functions as intended. While examining the frontend, ensure that you can see the remaining quantity displayed beside each choice in your form where the Max times this choice can be submitted option is enabled. If you observe “(0 remaining)” next to a choice, it indicates that the choice cannot be selected anymore. To reinstate its availability, you’ll need to adjust the quantity in the form builder, making that choice accessible once again.
And that’s a wrap! In just a matter of minutes, you’ve successfully configured your form to incorporate the Max times a choice can be submitted feature.