
Do you get frustrated when you’re excited to try out a product, but the registration process requires filling out a long, intimidating form with personal information and other questions? This happens all too often, and it leads to many customers abandoning the registration process.
Thankfully, there’s a solution! By using a multi-step form, the registration process can be broken down into smaller, more manageable sections. This makes it easier for customers to fill out and reduces the likelihood of form abandonment.
Why does a multi-step form increase form completion rates?
It’s simply a better way of organizing fields. It’s much easier for a form submitter to fill out a form if the fields are categorized. Furthermore, forms with many fields displayed on a single page may be tiring and overwhelming for submitters. It’s more difficult for submitters to focus on individual fields, which leads to high abandonment rates.
Finally, submitters who are filling out a multi-step form might feel a sense of accomplishment when filling out the form. It provides motivation to complete what has been started.
Guidelines on creating multi-step forms
There should be clear and concise instructions for each step. This helps avoid errors, saves time, and reduces the risk of frustration and form abandonment.
Submitters should be aware of how many steps they are going to fill up. They shouldn’t feel uncertain about when they will be finished with the form.
Lastly, it should be mobile-friendly and responsive, so submitters can easily navigate back and forth through the steps.
Creating a simple and clean multi-step form using Happyforms
One of the easiest ways to create a multi-step form is using the upgraded version of the WordPress plugin Happyforms.
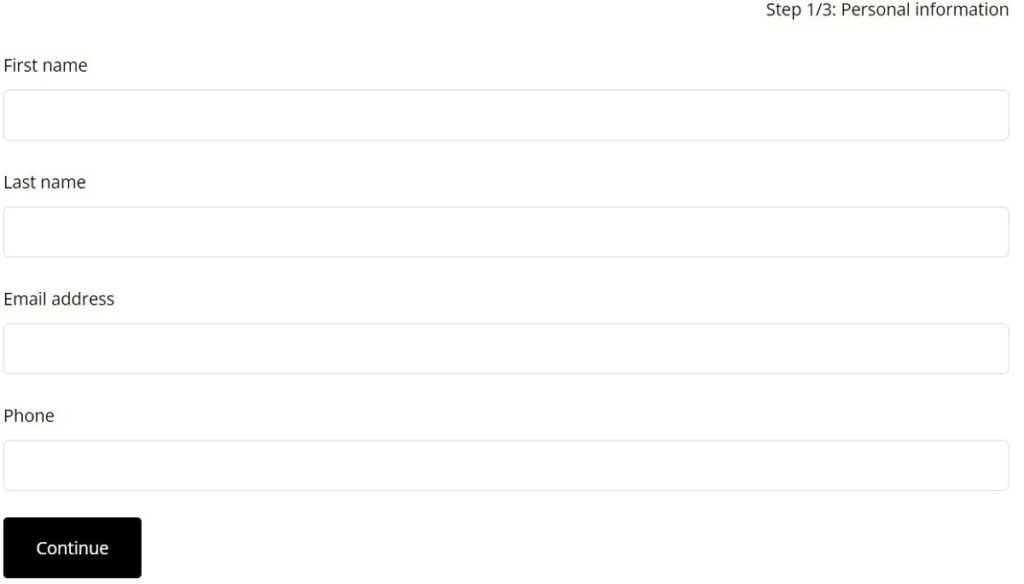
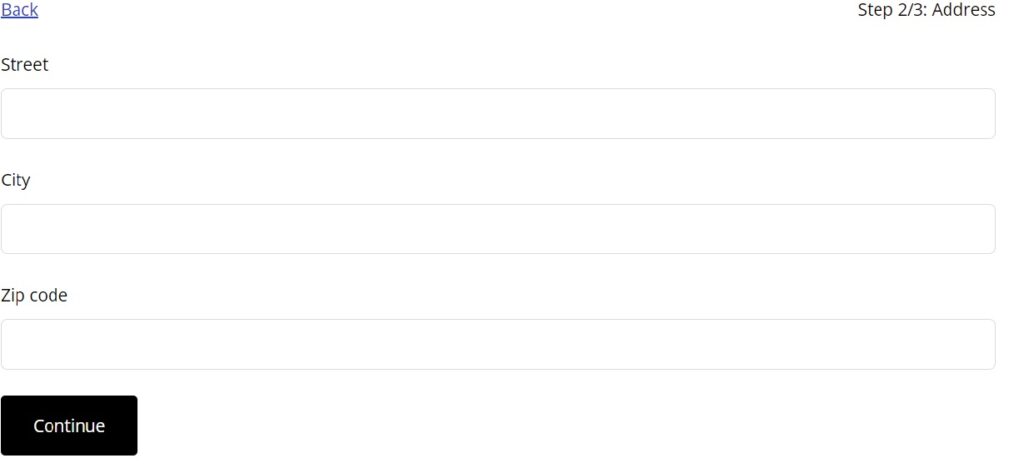
Step 1: Create a Form
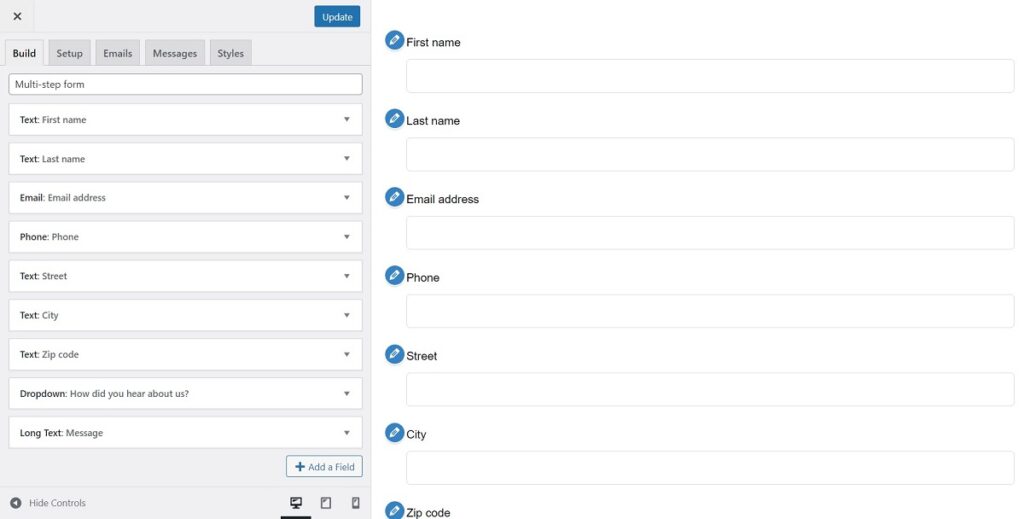
In your WordPress admin dashboard, head to Forms → Add New. This opens up the form builder, add a Title and populate your form with fields.
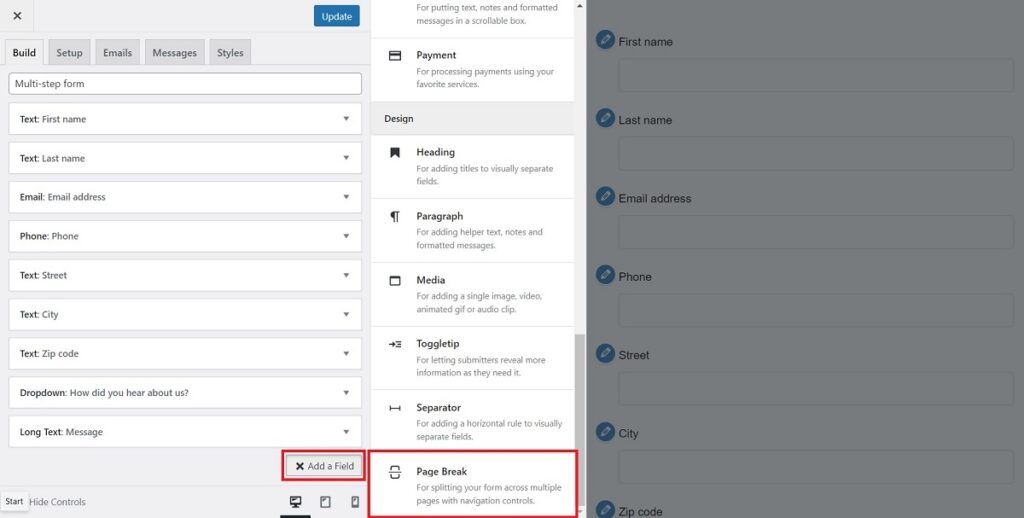
Step 2: Add a “Page Break” field
Click the Add a Field button, then under the Design section of the fields drawer, click the Page Break field to add it to your form.
Two Page Break fields will be added to your form, the first Page Break field is fixed on its position and can’t be reordered with the other fields as that is always the start of step 1 of your multi-step form. Unlike the first Page Break field, the second one, third, fourth are movable. The fields below a Page Break field are the ones included in its own step.
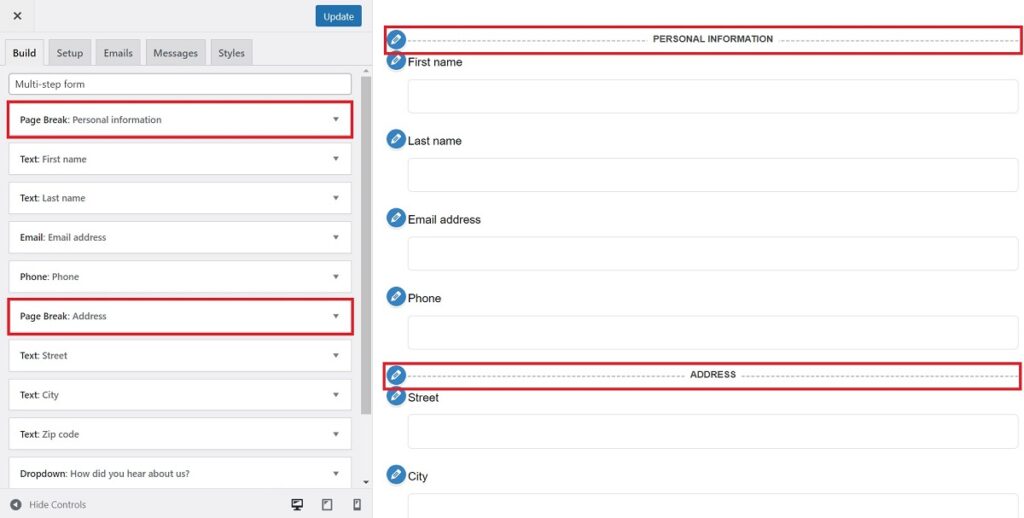
You can add more Page Break fields and this will be the number of steps you’ll be having for your form.
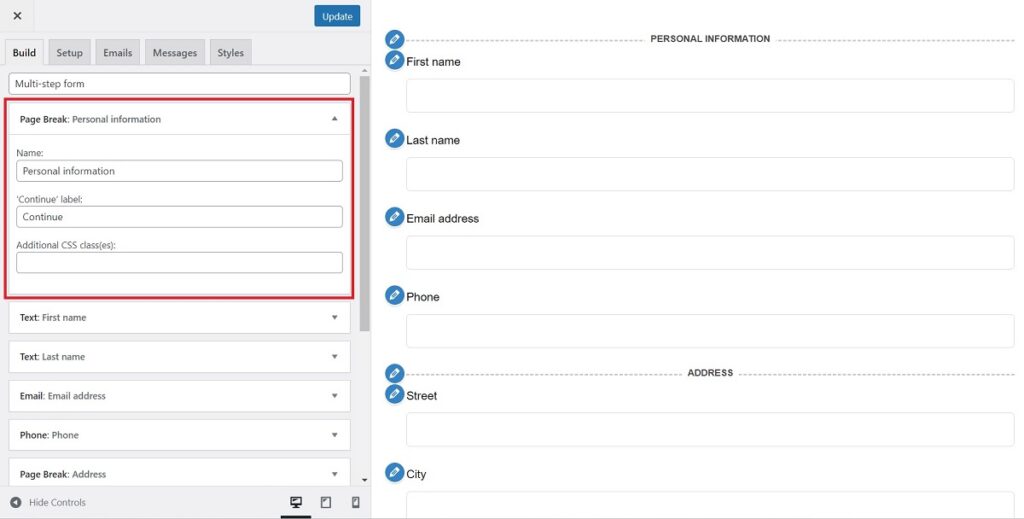
Step 3: Label your steps and buttons.
For each Page Break field, include a Name and a Continue label. The label will be shown on button to proceed to the next step.
The Step label can also be renamed under the Messages tab, just add a new value to the Current step field option to change it.
Change your form label colors
To change the color of the labels, head to the Styles tab then click the Multi Step section. Set the color that you want for the step indicator and the back link.
Done! You can now add your multi-step form to a post or a page and do some submission tests.