
You have recently launched a WordPress website and are now interested in selling your first e-book, a ticket, or accepting donations. After some research, you’ve discovered that you need to install an e-commerce plugin to collect payments from your website visitors. However, setting up an e-commerce plugin can be a bit complicated, and you’d prefer to do it in the simplest way possible.
In this article, we’ll show you how you can create a form with payment options on your WordPress website. This will make it easy to collect payments or donations.
Why use a form with a payment option instead of an e-commerce plugin?
E-commerce plugins, such as Woocommerce, provide a complete suite of tools for creating an online store. These plugins are designed to handle multiple products and provide a shopping cart experience, requiring users to fill in personal and shipping details before making a payment. To get the process to work, you’ll need to set up multiple pages such as a cart page, checkout page, and account page.
While these plugins are comprehensive, they may offer more features than you need. If you’re selling a single product or collecting donations, creating a form with a payment option can be much more efficient. This approach avoids requiring your users to input their shipping address or other unnecessary information.
Additionally, a form with a payment option is a better user experience. Users get to pay immediately on a single page—no more redirecting to your cart or checkout pages.
Choosing a form plugin that supports payment options
There are several form plugins to choose from. Most of them offer payment options as part of their paid services. Be sure to select the one that offers all the necessary fields for your form. Also, when choosing a form plugin, make sure it supports the payment platform (Stripe, PayPal, etc.) you’re using.
Happyforms offers a variety of features you need to create a form with payment options. It has a familiar interface which makes form building easy. And it has a “pay what you want” pricing model, so you can let your site visitor choose how much tip or donation they want to send you.
We’ll be using Happyforms Pro for this guide because it has integrations with both PayPal and Stripe.
Creating a form with a payment option
To start creating a form with a payment option, first install and activate the Happyforms Pro plugin.
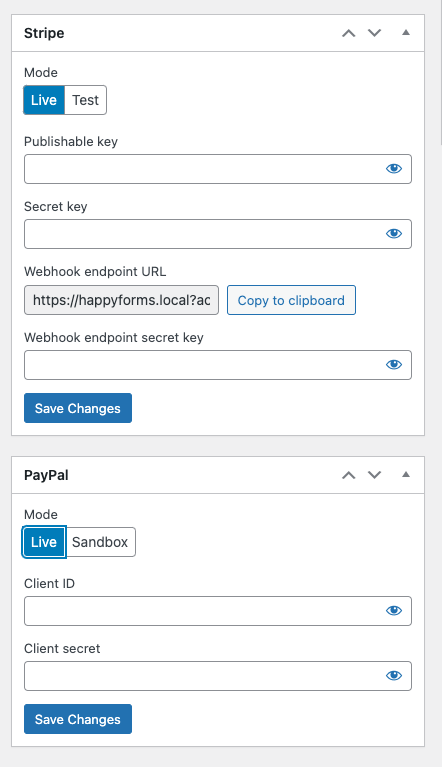
Once Happyforms has been activated, head to the Forms → Integrations screen and set up either PayPal or Stripe integrations.
After you’ve set up the payment integrations, you can start building your form. In the form builder, start adding your form fields, and make sure to include at least one Email field.
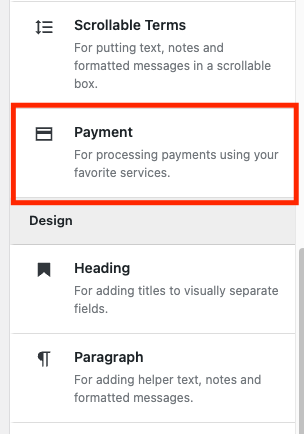
Next, add the Payment field.
Then configure the payment fields according to your needs. You can set the price and currency. You can also add conditional pricing using conditional logic. Happyforms also offers a “pay what you want” pricing feature and coupons feature.
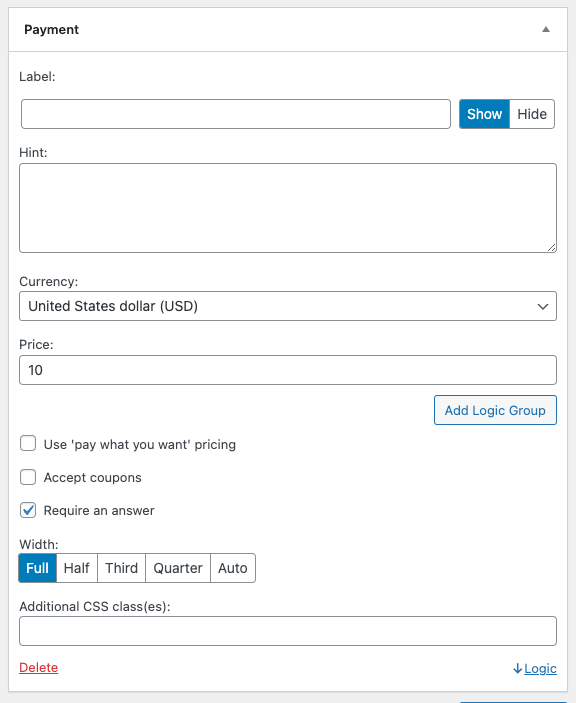
If you want to include customer data to the payment details sent to your payment platform, you can do so by turning on the Add to payment details option in every form field you have added in your Build tab.
After you’re done setting up the Payment field and other form settings, you’re form is ready. You can add it now to your WordPress page.