
Here you are: you need to build a custom registration form, with a design that fits your site, and you want the freedom to embed it wherever you like in your pages. Maybe you’d like to support additional user fields. So what are your options?
Option 1: use the default WordPress registration form.
WordPress offers a Meta widget that displays a link to the default login page. You can add it to any sidebar using your Appearance → Widgets screen. This isn’t optimal for a few reasons:
- The widget also displays links to your RSS feeds and WordPress.org.
- To reach your registration page, users will first have to click on your login link, and then click Register from there. Quite confusing.
Alternatively, you can manually add a link to your registration screen anywhere you like — WordPress’ registration screen is always found at https://yourawesomesite.com/wp-login.php?action=register.
Option 2: pick a user registration plugin
A dedicated plugin offers a few key advantages — depending on your choice, you’ll get one or more of the below features:
- Complete control over the design of your form.
- The freedom to show it anywhere on your site (and hide it when it’s over).
- A user experience tailored to your business needs.
- More options against spambots.
- Growing your mailing list.
- Premium memberships through a payment option.
You’ll find plenty of options — as a start, take a look at 6 of the best registration plugins for WordPress.
Creating a custom registration form with Happyforms
With our newly released Thrive Automator integration, you can now build a custom sign up form with Happyforms — without any coding. We’ll then use Automator to capture our form submissions, and turn them into registered users on our site.
Step 1: creating a registration form with profile fields
Head over to Forms → Add New in your dashboard to create a new form. Give a descriptive title to your form — we’ll use “Registration form” in this guide.

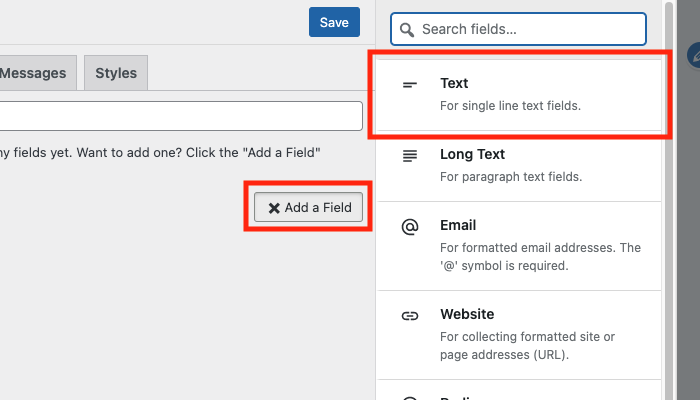
Click Add a Field at the bottom of your Build tab, then click Text to add a simple text field to your form.
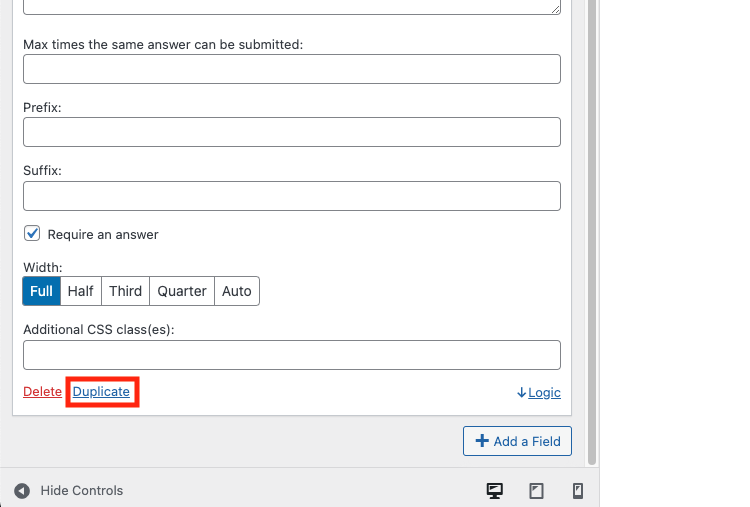
Set its Label to “First name”, and click Duplicate to quickly create a new text field. Set the duplicate field’s Label to “Last name”.
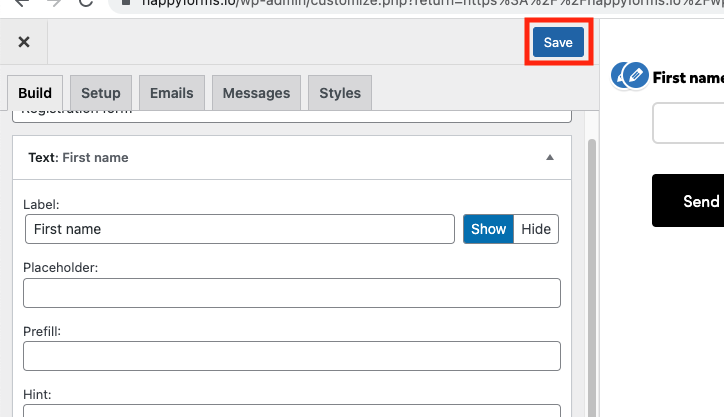
Click Add a Field again and add an Email field, then set its Label to “Email address”. Finally click Save at the top of your form builder. We’re done with our form setup!
Step 2: Install and activate Thrive Automator
Thrive Automator is great for multiple reasons — the top one being that it’s free. Go ahead and download it from Thrive’s Automator page, install it using your Plugins → Add New screen Upload Plugin button, and finally activate it.
Step 3: Setup a Happyforms automation with Thrive Automator
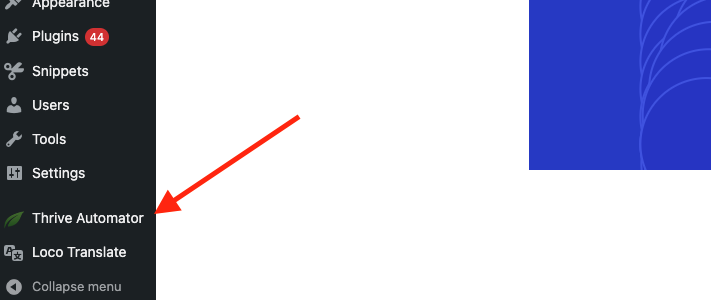
Head over to Thrive Automator in your dashboard. If you’ve already setup automations before, they’ll show up here.
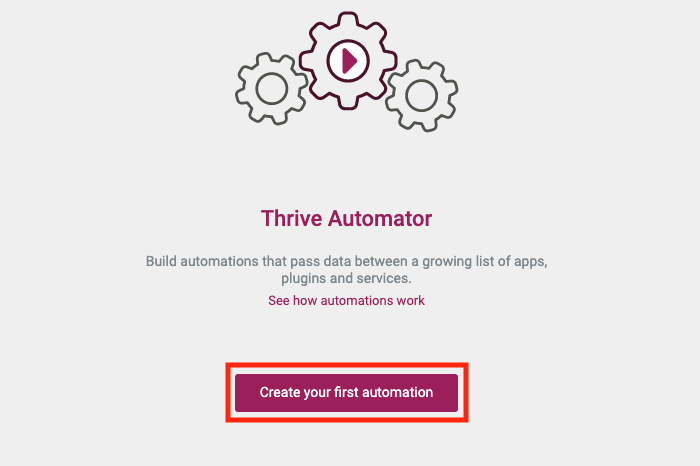
If this is your first automation, click Create your first automation:
Otherwise, click Add new in the top right part of the screen.

You can then click the pencil icon next to New automation to change your new automation title.
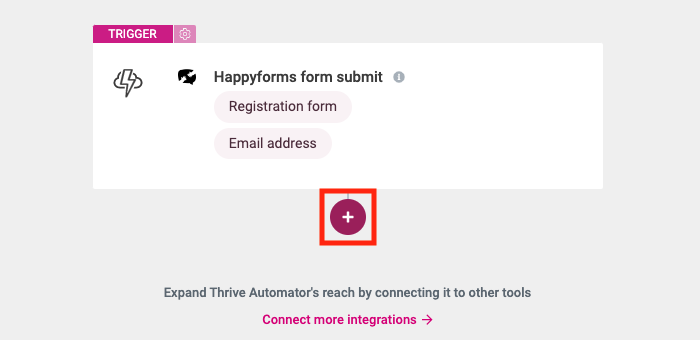
Under Choose a trigger category, click Happyforms.
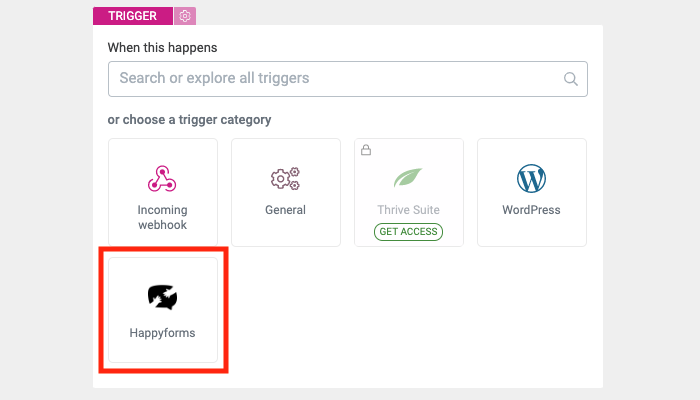
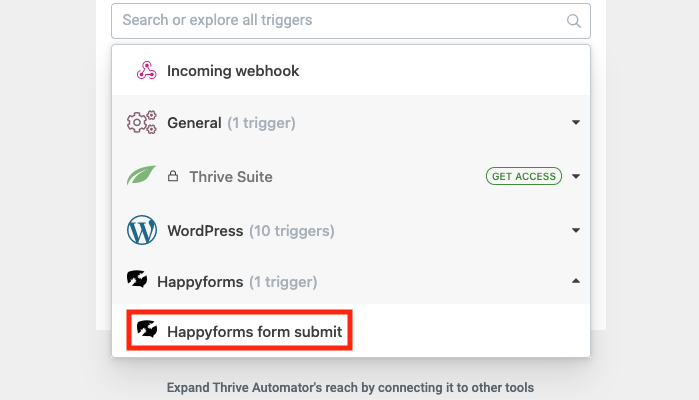
Doing so reveals a list of available triggers. Happyforms only exposes one trigger, Happyforms form submit. Click it and proceed to the trigger configuration step.
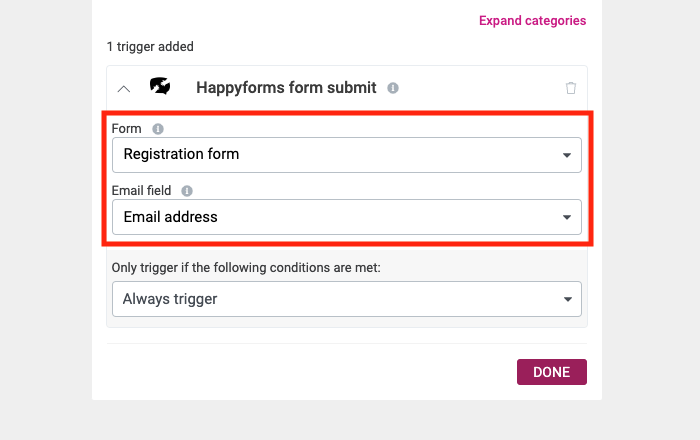
Configuring the trigger is really simple: we first pick the form that should trigger your automation, then select the Email field that holds the email address for the registered user. Go ahead, and select “Registration form” in the Form field. Then select “Email address” in the Email field field.
Click Done, then click the “+” button to move on and configure the action this automation will trigger.
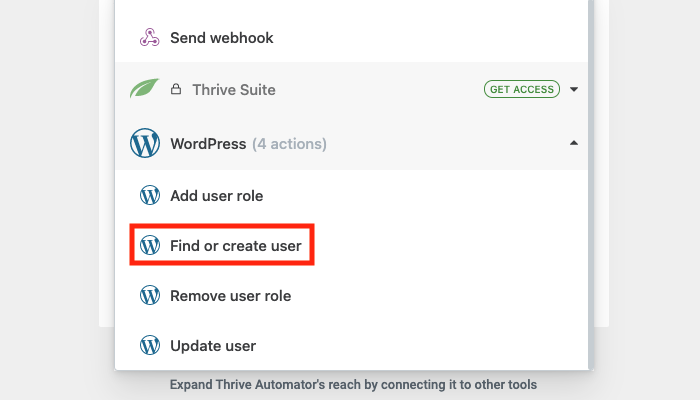
Under Choose next step, click WordPress to reveal a list of available actions. Click Find or create user.
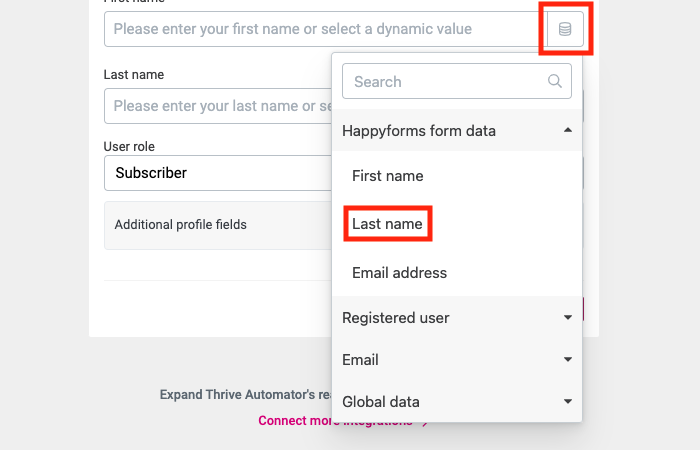
This action lets you map one or more fields from your form to one or more fields in the user profile. In this guide we’ll only map the first and last name — but you can map more by clicking Additional profile fields. Click the Insert dynamic data button next to First name, then expand the Happyforms form data group and click First name. Repeat the same steps for the Last name field.
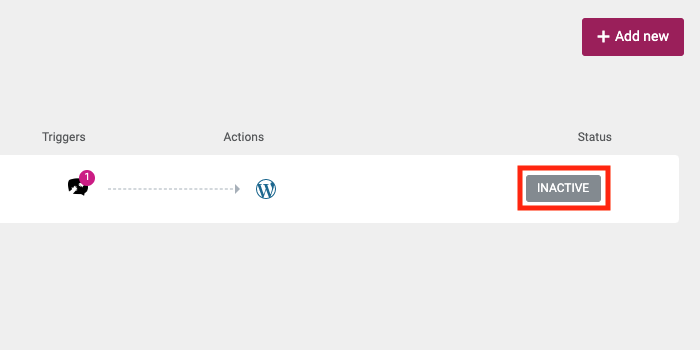
We’re almost there! We can now pick the desired role for new users registered through our form from the User role dropdown. When you’re done with that, click Done to close the action configuration step. Finally click Save and finish to exit back to your automations list, and click Inactive next to the automation you’ve just created to activate it.
Step 4: Testing your form automation
It’s now time to see it in action. Create a new post or page, or edit an existing post or page, and add your new form to it. Then save your changes, and view your post or page. Finally submit your form: if everything went right, you should be able to submit a new user, and see it show up in your dashboard’s Users screen.